Nordic hamstring curls at home: build a stable setup

Nordic hamstring curls at home start with a suitable fixed anchor, correctly adjusted ankle straps and a mat beneath your knees. First check that the attachment cannot open, slide or tip over. Then choose a range of movement you can control, keeping your hands ready to support you. A door, weight bench or fixed structure may work if it suits the attachment method. Without a suitable anchor, choose another hamstring exercise for now.

What do you need for a stable home setup?
For a Nordic curl, you kneel with your ankles secured and lean forwards from your knees. Your hamstrings slow the movement. This is eccentric muscle work: the muscles produce force while lengthening. A systematic review of training studies found improvements in eccentric hamstring strength following Nordic training. This supports its use as a strength exercise, but tells you nothing about the load capacity of your door or attachment (Medeiros et al., 2020).
Your home setup has three parts: a suitable anchor, a secure connection to both ankles and a clear exercise area. Use a mat that supports your knees without slipping. Leave enough room in front of you to place your hands on the floor and lower your torso under control.
| Available anchor | What needs to be right? | When should you choose something else? |
|---|---|---|
| Solid door | The construction and closing mechanism suit the attachment method; nobody can open it during use. | The exercise load could pull the door open, the door is damaged or its construction is uncertain. |
| Weight bench | The bench remains stable in the direction of pull and the strap cannot slip off its attachment point. | The bench slides, tips or has no suitable attachment point. |
| Fixed fence or beam | The structure is firmly secured and provides a suitable strap position without sharp edges. | The fence bends, parts are loose or the surface damages the strap. |
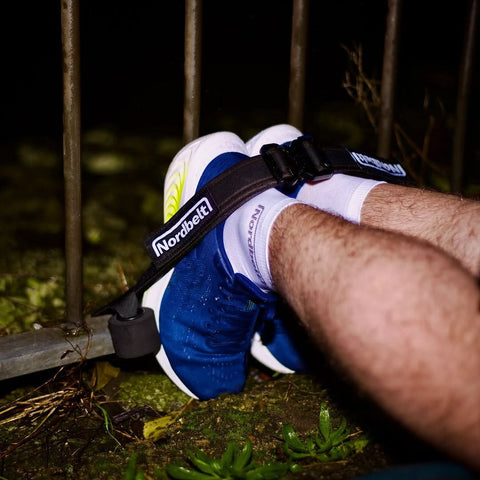
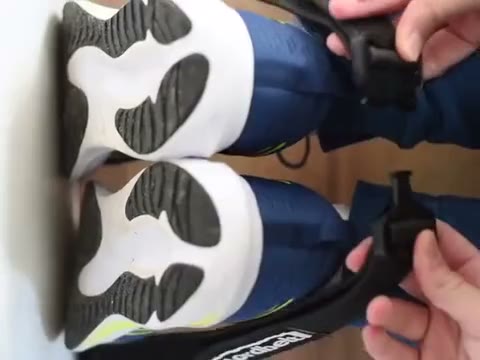
To secure your ankles at home without someone holding your feet, you can use Nordbelt. Its adjustable straps connect your ankles to a suitable anchor, while the padded supports cushion the contact area. The tool packs away compactly after training. It does not make an unsuitable door or bench suitable.

How to choose and check the attachment
A door: check which way it opens
Only use a door that is suitable for the specified attachment method. The training load must not be able to pull it open. Agree with everyone at home that the door must stay closed, and prevent anyone from opening it unexpectedly during the exercise.
Position the anchors as demonstrated and close the door fully before loading the setup. The photo at the top shows the placement stage under an open door; the door must be closed when you exercise. Follow the Nordbelt instructions and demonstrations for the exact placement.
Check the straps, stitching, fasteners and anchor before every set. Pull the strap in the direction it will be loaded during the exercise. This may reveal movement or a loose connection. A hand check does not prove a maximum load capacity or resolve doubts about the door's construction.
A weight bench: weight alone is not enough
The bench must withstand the pull at the chosen attachment point without sliding or tipping. Check whether the strap can move along a leg or frame. A heavy bench is not automatically suitable: its shape, joints and the direction of force also matter.
Use the attachment method in the instructions. Do not casually substitute a chair, loose piece of furniture or pile of weights for a weight bench.
A fence or beam: inspect the whole structure
A fixed structure in a garage or garden may be an alternative. Check how the fence or beam is secured, not just the point the strap wraps around. Avoid loose components and sharp edges. The strap must remain in its intended position as you gradually apply tension.

Adjust both ankle straps before you start
Kneel with your back to the anchor and place your feet in the straps as instructed. Adjust both sides so the ankle supports sit correctly and both feet stay in position. Close the buckles fully and secure the hook-and-loop fastening as shown.
Gradually apply tension before leaning forwards. If one foot slips, a strap twists or you feel a sharp pressure point, release the tension and adjust the placement. Tightening harder is not the answer to a poorly positioned ankle support. If the position remains uncomfortable, do not use the setup.
Check the product instructions for the intended users and any usage limits. Those limits do not replace a suitable anchor and a stable setup.
Take your Nordic curl from the first rep to week 10.
A concrete 7-page plan: build up week by week, without pushing too fast.
- 01A clear week-by-week progression
- 02Technique and the mistakes to avoid
- 03A simple log you will actually use

≤51%
✓Backed by research
Van Dyk et al., 2019: meta-analysis of programmes with NHE. Not an effect test of Nordbelt or this protocol.
Open the download page again or check the email we sent you.
Open the download page ↗Keep your first repetition deliberately small
After a gentle warm-up, begin with a limited movement. Your first repetitions are an opportunity to check whether you can control the descent while the attachment stays in place.
- Kneel upright on your mat. Keep your torso long, with your shoulders, hips and knees as closely aligned as possible.
- Keep your hands in front of you, ready to provide support. Do not put them behind your back while learning.
- Slowly lean forwards from your knees. End the unsupported descent before you lose control.
- Use your hands to catch yourself gently and help you return if needed. You do not have to come back up without assistance.
- Repeat only if the attachment remains stable and the movement is pain-free.
If you immediately need your hands, reduce the range or choose more assistance. The guide to easier Nordic variations explains your options. For more background on the movement, see the general Nordic hamstring curl guide.
Build control and training load separately
Secure ankles do not mean you already have the strength for a full Nordic curl. Keep the same setup next time and change one thing at a time: a slightly longer descent, a little less assistance or a few more repetitions. This makes it easier to judge which change you can manage.
You do not need to accumulate lots of repetitions immediately. A systematic review found strength gains with both lower and higher training volumes, including programmes lasting six weeks or longer. Study quality and exercise protocols varied, so the findings do not establish one starting dose for everyone training at home (Cuthbert et al., 2020).
Fit the exercise around your other leg training and sport. Do not increase the load while soreness clearly affects your normal movement or technique. If you have an existing injury, decide with your clinician whether the exercise and load are appropriate. Stop if the movement causes pain.
Address the problem you actually see
The strap, bench or door moves. Stop and unload the attachment. You need a different placement or anchor, not an easier repetition using the same uncertain connection.
Everything stays fixed, but you fall forwards. The movement is too demanding at that point. Shorten the range and use assistance earlier. Check the common Nordic curl mistakes too.
Your ankles or knees hurt. Check the positioning and knee support. Do not continue by tightening harder or trying extra repetitions. Seek advice if discomfort keeps returning.
If you have no suitable anchor, you can train your hamstrings another way. With hamstring slider exercises, for example, you bend your knees while lying on your back without fixing your ankles to an anchor. This is a different exercise, not a test of readiness for a full Nordic curl.
Frequently asked questions
Can I do Nordic hamstring curls at home without a machine?
Yes. You do not need a dedicated Nordic machine, but you do need a suitable anchor, reliable ankle support, knee padding and clear space. Follow your equipment's attachment instructions and choose a range you can control. Loose furniture is not an automatic substitute for a suitable setup.
Is every solid-looking door suitable for Nordic curls?
No. Appearance alone does not establish a door's construction, closing mechanism or ability to withstand a pulling force. Use the specified side and attachment, close the door fully and prevent unexpected opening. Do not start if anything is damaged, moves or causes doubt. A successful hand check gives no general load guarantee.
Do I need to lower myself all the way to the floor?
No. Choose a distance over which you can slow the descent, and use support before losing control. Your hands can also help you return. Increase the range only when you can repeat the smaller movement without pain, sudden dropping or movement of the attachment.
How often can I do Nordic curls at home?
That depends on your experience, recovery and other training. Follow a suitable progression and assess your response to the previous session before adding more sessions. Increasing repetitions, reducing assistance and training more often in the same week makes it difficult to identify which change was too much.
What should I put under my knees?
Use a mat or suitable knee support that cushions pressure and stays in place. Your knees need a stable base while you lean forwards. A thick but unstable cushion is therefore not necessarily better. Do not train through pain; check the surface and your position first.