

Nordic curl setup for a small space: measure and store


A Nordic curl setup in a small space can work well if you look not just at the anchor point, but at the entire range of motion. You need a fixed place for your ankles, a comfortable kneeling zone and clear catch space for your hands and upper body. First measure those three zones on the floor, start with a short range of motion and clear away loose furniture. This way you will discover before the first repetition whether a bedroom, studio or compact home gym is really suitable.
In short
A compact Nordic curl setup is less about a particular floor area than about a straight, obstacle-free path. First lay down a mat. Kneel where your ankles can be fixed low and stretch your arms forward as if you are going to gently catch yourself. Everything between your knees and the farthest point your hands can safely reach is your training zone.
Then check five things:
- the anchor point does not move when you first load it firmly with your hands;
- your knees are completely on a mat and not against a skirting board or threshold;
- you can move your hips and torso forward without hitting a bed, table or chair;
- your hands can reach the floor early if you want to shorten the braking phase;
- the walking route through the room is free during the set.
The Nordic hamstring curl is a heavy eccentric exercise. Research programs therefore gradually increase the load and range of motion instead of immediately requiring full repetitions (Medeiros et al., 2020; Petersen et al., 2011). That fits well with a small space: a controlled short range requires less catch space and gives you a clear first step.

Measure your small space into three zones
Do not use general room length as the only measurement. Measure the place as you will actually use it.
Zone 1: anchor and ankles
Mark where your ankles will be. There should be enough space to place, adjust and test the fixation before each session. A door can be practical because the anchor point is at the edge of the room, but the door and its attachment must be suitable for the chosen layout. The broad consideration between door, bench and fixed anchor point is in the existing guide for a Nordic hamstring curl at home; here it only concerns the available floor around it.
Zone 2: knees and mat
Place the mat with the short side at the anchor point and kneel in the real starting position. Check that your knees are not half on a seam, carpet edge or elevation. Also leave enough space next to your knees to adjust the strap or your shoes with one hand without colliding with furniture.

Zone 3: braking and catch path
Don't make it a full Nordic yet. Keep your body tall, lean forward only slightly and put your hands down early. Then move your hand placement further away step by step as long as the floor remains clear. Mark the furthest controlled point with a piece of painter's tape. That is your current training length; not the theoretical length of a full repetition.
Explore this topic further: Nordic curl setup for tall athletes: space and adjustment.
What setup do you need for a stable Nordic hamstring curl?
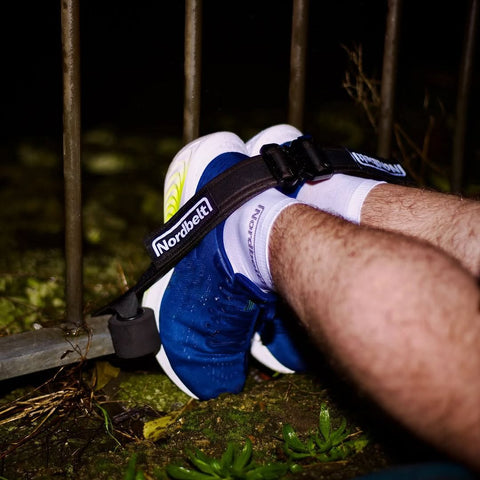
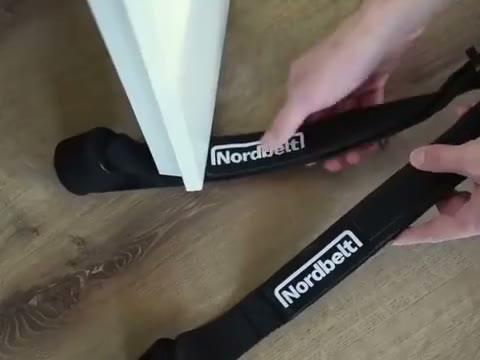
If you want to add Nordic curls at home without a training partner or a large gym machine, Nordbelt provides a compact setup with stable ankle fixation. The practical advantage in a small room is that the training zone can be cleared again afterwards. The limitation remains important: you still need a suitable, tested anchor point, knee protection and enough space to catch yourself with your hands in a controlled manner. The tool does not replace technique or gradual progression.
Before making a choice, also check whether you are really looking for a Nordic setup. A large leg curl station, a Nordic bench and a low ankle fixation have different functions and space requirements. The separate comparison about a Nordic hamstring curl machine remains the right place for that choice. This article only helps you assess whether the compact variant can be placed logically in your room.
Take your Nordic curl from the first rep to week 10.
A concrete 7-page plan: build up week by week, without pushing too fast.
- 01A clear week-by-week progression
- 02Technique and the mistakes to avoid
- 03A simple log you will actually use

≤51%
✓Backed by research
Van Dyk et al., 2019: meta-analysis of programmes with NHE. Not an effect test of Nordbelt or this protocol.
Open the download page again or check the email we sent you.
Open the download page ↗A compact Nordic curl setup around a door
In a small room, an anchor point on the wall or door side often keeps the layout clear, because the path of movement then runs from the edge to the open center. So don't automatically place a bed or couch in front of you; first check which side of the anchor has the longest free floor zone.
Use this order:
- clear the normal walking route and close the door completely when it is part of the setup;
- first test the attachment with your hands according to the instructions of the chosen setup;
- place the mat straight in front of the anchor, not diagonally around a piece of furniture;
- kneel, check the ankle position and place both hands where you want to catch;
- only perform the range of motion that remains controlled within that marked path.
A diagonal position sometimes seems to save space, but can bring one hand closer to a chair, cupboard or edge of the bed. A straight short track is usually easier to control than a longer diagonal path.
Catch space for Nordic curls without a full rep
You do not need to be able to complete a full repetition first to test the catch space. Use three dry tests without fatigue:
- hand test: kneel upright and place your hands on the first catch position;
- short lean test: move forward a few centimeters and return while keeping your position the same;
- early catch test: place your hands well in front of your limit and gently push yourself back to a kneeling position.
Only when these three steps are successful without a sliding anchor, collision or unexpectedly slippery surface, can you make the braking phase a little longer. Consistency with the program and a manageable progression are more important than one maximum repetition; studies on the implementation of Nordic programs actually show that feasibility and compliance strongly influence how well the program works in practice (Goode et al., 2015; Ripley et al., 2021).
If the room is shorter than your current braking phase, shorten the range or temporarily choose another exercise. Do not move closer to a hard cabinet or bed edge to still complete a full repetition. Those who don't want to use a bench will find additional anchoring and regression context in the guide to the Nordic hamstring curl without a bench.
This is how you keep a small home gym free of obstacles
A small home gym does not have to be permanently set up as a gym. Work with a fixed temporary layout:
- one place where the mat always faces in the same direction;
- one basket, bag or shelf for strap and accessories;
- one clear catch path that you visually check before the set;
- one place off the track for phone, water bottle and free weights.
Do not place the mat over a rug edge if this causes height differences or sliding. Also move stools, coffee tables, toys and cables completely outside the zone. An object just next to your shoulder can seem harmless at the start, but can still get in the way once your hands move further forward.
If you first want to understand the exercise itself separately from the room layout, use the general explanation about the Nordic hamstring curl and regressions. This way, space planning remains a practical layer on top of a technique that you already understand.
Store the Nordic curl setup after your workout
A compact setup is only really practical if dismantling is as predictable as setting up. Create a short fixed routine:
- loosen the ankle fixation before moving the mat;
- check that strap and fasteners are dry and free of dirt;
- roll up the band loosely without sharp kinks;
- store small parts together so that you have everything ready for the next setup;
- Put the mat upright or roll it up outside your daily walking route.
For precise setup and checkpoints, use the Nordbelt how-to guide for home setup. That is the secondary route if you want to see how the parts are used after the space measurement; it does not change the requirement that your anchor and catch zone must be suitable.

Common mistakes in a small room
Measure the mat only
The mat is not your entire training zone. Your upper body and hands move in front of your knees. Therefore, always measure from the anchor to the furthest controlled catch point.
Using an obstacle as a stop
A bed edge or sofa is not a planned catch surface. You want to be able to land with your hands on a free, non-slippery surface and decide for yourself where the braking phase ends.
Do the first test under fatigue
Test the room layout before training. Fatigue makes it more difficult to correct a sliding mat, tight hand placement or angled path in time.
Slant the setup to gain centimeters
A diagonal path can have different obstacles on the left and right. Keep the position straight, even if that means that your range of motion remains shorter for the time being.
Leave everything loose afterwards
Loose straps and accessories make the room less usable and increase the chance that parts will be missing during the next session. Use one fixed storage location and the same assembly order.
Frequently asked questions
How much space do you need for a Nordic curl?
There is no universal number that is correct for every body height and range of motion. Measure from your ankle anchor to the farthest point where your hands land at your current controlled range. Only include free floor space and keep hard furniture out of that track. Start with a short range if room is limited.
Can a Nordic curl be done in a small bedroom?
Yes, if a suitable anchor point, full kneeling area and straight catch path are available. Only move a bed or bedside table if the room remains really free afterwards; try not to move between furniture. If even an early hand catch does not fit, choose another location or a shorter regression.
How do you test the catch space without a full rep?
Kneel in the starting position, place your hands on the floor early and first make a very short leaning movement. Mark the hand position and only extend the track when the anchor, mat and floor remain stable. This way you test the space without forcing a maximum braking phase.
Where do you store a compact Nordic curl setup?
Choose one dry basket, bag, drawer or shelf outside the walking route. Loosely roll up the strap, keep small parts together and store the mat upright or rolled up. A fixed location shortens the next setup and prevents the training zone from being permanently occupied.
Do you need a large fitness machine for Nordic curls?
No. The key is a low, stable ankle fixation and a controlled range of motion, not the size of the device. A compact solution can fit in a small room, but only if anchor point, knee protection, floor grip and catch space are suitable for your setup.